Today's Designer D.I.Y. in the New York Times tells us how to make "A Vacation Accessory With a French Attitude." I'm not planning any vacations in the near future, but maybe you are, so faites attention! This week we're going to make a handbag from a square of fabric, as directed by Roland Mouret, apparently famous for this dress, this year's model of which you can get for $2650.
Mouret used denim cut-offs for his 20-inch square of fabric but if you aren't willing to repurpose your pants, "a thick cotton-like denim works particularly well." (I wonder what cotton-like denim is really made of.) No mention of how to cut the square if you are indeed using your pants, because where the seam falls will have some effect on the ease of construction. But you'll certainly figure it out after your first square doesn't work.
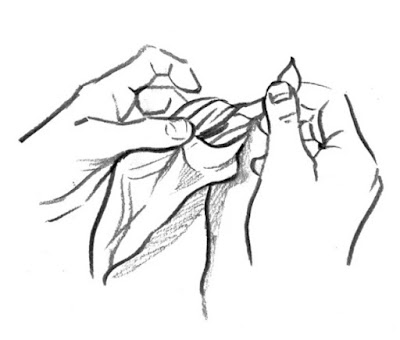
A hallmark of the NYTimes series has always been confusing directions, and this installment does not disappoint. Follow along, if you can: "Lay your fabric square flat. Taking two diagonally opposite corners, fold toward the middle with a significant overlap until a point is created at one of the remaining corners. The fabric will now be in the shape of a kite. Knot the corner of the fabric where the point has been created."
 |
| Illustrations from New York Times Thursday Styles |
If you're a bit lost, consult the diagram. Hmmm. What do you see in the diagram? If you're "taking two opposite corners," why are the two hands holding adjacent corners? Which of the remaining corners is making the point? Are you making a point from the corner in the left hand or the right hand? Where is the kite shape? Why are you folding the fabric in the first place? If you want a point in one corner, why not just grab it and let the rest of the fabric hang? The next diagram shows you how to tie a knot. Or gives an approximate impression of tying a knot, because it's not very clear what is what in this drawing. But it's pretty.
Moving right along, now you repeat to make a point and knot in the opposite corner from the first one. "This will be slightly more difficult now that the other corner is already knotted," the Times says, presumably because the knot somehow interferes with the unnecessary folding into an unnecessary kite shape.
Almost finished. Now you take the two other corners and knot them together, if you can figure out how to make points without kite-shaped folding first. (If you've forgotten how to tie a knot, here's another diagram.)
Finally, you need a "heavy link chain or several long necklaces" for a handle. Thread it or them through the knots at the two ends. No guidance on how to do this, although "using a chain with a jewelry clasp is easiest as it will allow you to thread through the knots before closing the chain." The only illustration of the finished bag, however, shows no clasp, just a single length of chain. No hint on how to keep the ends of the chain from coming out of the knots. No hint on what to do if you used "several long necklaces." Be creative again.
You're done! Mouret says the bag would go well "with wide leg trousers and a one-shoulder silk top for an al fresco drink with friends."


No comments:
Post a Comment